Category: UTAU Tutorials

How To Use VCV UTAU Voicebanks

Introduction to VCV UTAU

Though the UTAU software was initially designed to process CV voicebanks, the UTAU community, over time, began to experiment and construct new recording methods. One such technique that developed was referred to as “triphones”, “triphonics”, or 連続音 ( renzokuon ). The approach would later be popularly referred to as VCV, or “Vowel-Consonant-Vowel”. VCV was the second major recording method created by the UTAU community, and it soon became one of the most popular and widely adopted. It is commonly associated with multipitch voicebanks (a UTAU recorded with multiple voicebanks at multiple pitches) to obtain even greater realism.

A triphone or triphonic is a sound consisting of three basic phonemes. Phonemes are a distinct unit of sound used in language, such as “k” “d” “p”. VCV utilizes triphones to create a smoother, more lifelike vocal than CV by “stringing” three phonemes together. So, within VCV, a triphone would look something like “a ka”. So long as the voicebank has a high-quality OTO, UTAU will blend together the starting and ending vowels of one note into the next, creating a fluid voice.

Numerous members of the community will argue for and against VCV’s ease of use. Many claim recording and configuring VCV is more difficult and time-consuming than VCV, but that it is more straightforward to utilize and, ultimately, procures a better sound.

Using VCV

Let’s learn how to use VCV in UTAU! First, load up the desired Voicebank and UST file (if you have one). There are two scenarios here: the UST is either formatted for VCV or it just isn’t. Not every UST comes in VCV format, but you may really, really want to use the UST. Fear not, there are many options to remedy this situation!

The tedious method that we aren’t going to actually consider a method, but rather a painful last resort: Add the preceding vowel to the lyric: Let’s say you have two notes “か” (ka) and “あ” (a). Simply add an “a” in the same note as あ. Simply, あ now becomes “a あ”.

The easiest method (that, unfortunately, costs money): UTAU Shareware: If you have the shareware version of UTAU, you can simply hit the auto VCV button, and UTAU will turn the vowels into VCV!

Click “A” for auto VCV

Other methods: Plugins: Some plugins may convert the CV vowels into VCV without altering the rest. Others may turn the entire UST into VCV. Experimentation is key! IroIro is our favorite recommendation, as the plugin has many other useful features packed into it as well.

Navigating to your installed UTAU plugins

If you have IroIro Installed, follow Tools > Plug-Ins(N) > IroIro. Select CV -> VCV and click OK.

IroIro’s many options

Once your UST is in VCV format, you are ready to proceed.

Fitting a UST to a VCV Voicebank

Fitting a UST file to a UTAU Voicebank will definitely improve the sound and make your covers appear more professional. By fitting the UST, you are telling the software to conform to that particular UTAU’s configurations and setup (OTO). This is an important step if the UST was not explicitly made for the UTAU you are using, and it helps to improve the fluidity and clarity of the voice. So, let’s do it!

To start:

  1. Open a UST file
  2. Select all (Ctrl+A)
  3. Right-click on a note
  4. On the pop-up, select “Property” or “Region Property” (if you selected all notes). A new window will appear.

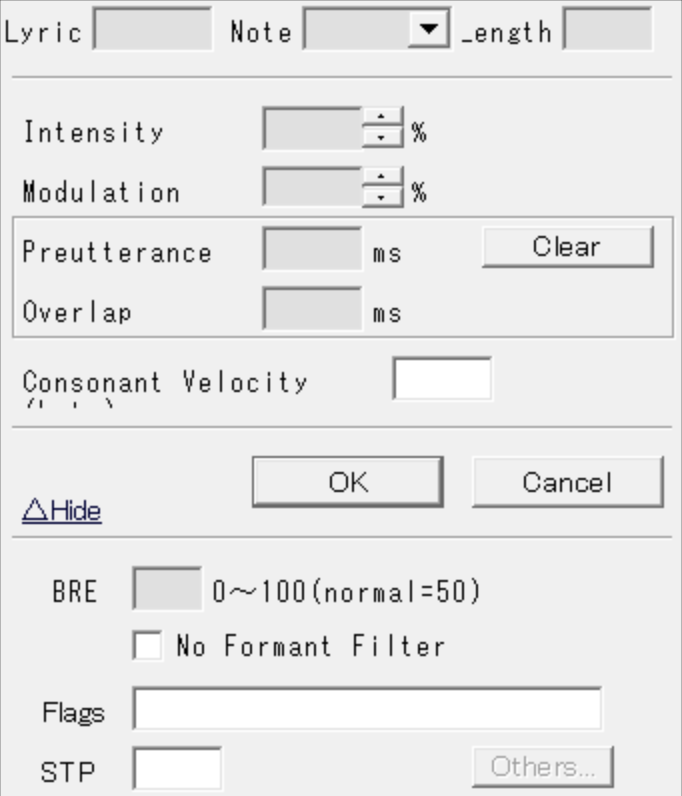
  5. You may notice sections on this window labeled “Preutterance” and “Overlap”. To their right, there is a “Clear” button. We want to click that.
  6. Next, at the bottom of the window, there is a box labeled STP. 
    1. If it has a value, delete it. 
    2. If the box is grayed out, double-click the box to clear it.
  7. Press “OK”
  8. In the top right of the main window of UTAU, you will see a group of four buttons (ACPT, P2P3, P1P4, RESET).
    1. Click RESET
    2. Then click P2P3
    3. Next, P1P4
    4. P2P3 again
    5. Click ACPT (You can click this multiple times if you see any red “!”, and it may take care of those. More on that in just a second!)
  9. That’s it! You’ve fit the UST to your VCV Voicebank

Special Characters, Envelope Issues and Other Problem Samples

Special Characters

How to use UTAU VCV Voicebanks: Example of notes with special characters
Example of notes with special characters

While fitting a UST to your UTAU, you may find errors highlighted as red “!” along the way. VCV is a popular method and widely employed, so a user may run across custom notes, properties, and expressions within a UST. Your UTAU may not have these special notes and sounds, so, we need to run through a few options.

  1. Manual removal
    1. Simply edit each note, one by one, and delete the extra symbols.
  2. SuffixBroker (for custom characters at the end of a note such as an up or down arrow, a number, or another special symbol)
    1. Select the notes you want the characters removed from
    2. Found under: Tools > Built-in Tools > SuffixBroker
    3. Leave the box blank, click OK, and now the Suffixes are gone! PLEASE NOTE: this does not always perform 100%. Make sure to double-check your work.
  3. Third-Party Plugins
Example of notes with special characters removed

Much better!

Envelope Issues

How to use UTAU VCV Voicebanks: editing envelopes

The error still shows up, and, more confusingly, the sound sample exists and your oto is fine. Grr… Now that’s frustrating! But we have a fix. Let’s check and edit some envelopes!

Very carefully, right-click on the note. A new pop-up will appear. Hover down to “Envelope…” and click on it.

How to use UTAU VCV Voicebanks: editing envelopes

And…

How to use UTAU VCV Voicebanks: editing envelopes

YIKES! That’s pretty bad! Worry not, there’s a simple fix. Let’s click “Normal”. 9/10 times, that does the job.

How to use UTAU VCV Voicebanks: editing envelopes

If the error still persists after hitting “Normal”, simply drag the red boxes around until they look, well, normal. Click OK and it should be good to go!

How to use UTAU VCV Voicebanks: editing envelopes

Much better, and now our “!” is gone. We are ready to tune and mix!

Other Problems

Some users may experience odd glitches. If you play the track back and notice slurring happening, you may want to change what notes you select. In our experience, selecting only the notes tends to help. Sometimes, hitting Ctrl+A selects rests and other unique settings that cause the fit to mess up. Click the first note of the vocal track, and then scroll to the end. Select the last note by holding down Shift, then left-click the lyric. Fit the UST again, and it should work!

Conclusion

Today, we’ve covered quite a bit about how to use VCV UTAU Voicebanks! With these tools, you should be ready to dive right in. We hope this resource has been a big help.

Need more assistance with UTAU and creating your very own voicebank? STUDIO OGIEN has compiled resources to use with the UTAU software. Check it out here! If you can’t find what you’re looking for, please let us know through our contact form or leave a comment on this article. We can’t wait to see what you create!

Setting Up Multipitch, Multiexpression Voicebanks in OpenUTAU

Introduction to Multipitch, Multiexpression Voicebanks in OpenUTAU (as of January 2022)

Before We Begin

This tutorial is a bit much, and it acts as Part One to our Voice Colors blog! Today, we want to go over how to set up Multipitch, Multiexpression voicebanks in OpenUTAU. The tutorial assumes you understand the following:

  • How Multipitch voicebanks work in UTAU
  • How to use and set up a Prefix.map
  • Suffixes and Prefixes, and how to use them to create Multipitch

This tutorial also assumes:

  • You have operational voicebanks prepared
  • All of your pitches and expressions, for each voicebank, have a different suffix

Lastly, we are not experts! We are learning along with our community. There may be more than one way to perform the following steps, and things may change in the future as OpenUTAU develops. We will do our best to keep this blog as up-to-date as we can, and we will come back to make edits when necessary. Knowing that, let’s dive in!

Getting Started

We know now that it’s possible to set up Multipitch, Multiexpression Voicebanks in OpenUTAU. Today, let’s go a step further and use our knowledge about Voice Colors and PrefixMaps. Let’s get into the nitty-gritty and set up something a little more complex! 

For this example, I will be porting over an existing UTAU with five different appends/expressions. As this is not a STUDIO OGIEN created UTAU, we will be redacting the name to avoid confusion. We do not manage or act as user support for this voice, and the following tutorial is only for educational purposes. Now, let’s set this up!

To start, I have downloaded all 5 expressions as well as organized and extracted them on my Desktop. For the sake of sanity, I have also prepared six new folders for extra samples to help keep organized during the process. Make sure to keep the original compressed files as a backup, just in case.

Multipitch, Multiexpression Voicebanks in Open

Let’s begin inside Voice 1’s folder. I have Voice 1_extras open alongside it. Let’s delete the $read. Next, if you have breaths and other samples, let’s sort them into the _extras folder for now. 

Alright, now that we have cleaned up, we are left with the following three folders, each containing a unique pitch.

Multipitch, Multiexpression Voicebanks in Open

For the sake of organization, let’s rename these folders. For this example, I will name this Voice 1_[original folder name]. Go ahead and repeat these steps with the next expressions.

Multipitch, Multiexpression Voicebanks in Open

Finding Pitches For Mystery Files And Unsorted Folders

As I began to clean up Voice 2’s folder, I noticed a small situation. We have a bit of a dilemma on our hands!

Multipitch, Multiexpression Voicebanks in Open

One of the pitches for Voice 2 is in the main directory, it hasn’t been labeled with the pitch’s name, and there is no Suffix in the oto.ini. If this is your own UTAU, and you know what the pitch is, go ahead and throw these samples into their own labeled folder. If this is not your UTAU, make sure you check the readme files provided to figure out the pitch. However, let’s say there was no documentation to help. We can still find the pitch, even if we’re not musically inclined. I will show you how to find the pitch using REAPER!

Multipitch, Multiexpression Voicebanks in Open

After opening, drag and drop a sample into the track. To understand what pitch this sample was recorded on, I’m going to add an FX to the track called ReaTune.

Multipitch, Multiexpression Voicebanks in Open

Hit OK, and you will see a new window pop up. Play the track and watch REAPER works its magic.

Multipitch, Multiexpression Voicebanks in Open

The pitch will waver, so pay attention and try to find the average. If you can also find documentation on the voicebank, that will help a lot as well. Create a new folder with the pitch’s name, and move the voice files into it. Let’s proceed!

What To Do With Unique Samples and Other Files

What do we do with our extras, now that our folders are set up? Well, that depends, and it can be done in many different ways. For this particular Multiexpression OpenUTAU voice, I’m going to put in a little more manual effort to make sure these notes always work.

Let’s open Voice 1_extras back up alongside Voice 1. 

Multipitch, Multiexpression Voicebanks in Open

We want to still save the readme files, the character file, and the icon to merge together later on. For now, I will leave those in this folder. However, for the voice samples, it’s a little more complicated. In this example, the extras are recorded for only one pitch. Normally, these would be useable in regular UTAU, but with the nature of these Multiexpression OpenUTAU configurations, we need to define them more clearly for the program to understand what’s going on. So, gather your Suffixes and get ready to copy-paste, and copy-paste a lot at that.

Multipitch, Multiexpression Voicebanks in Open

Inside the oto.ini, we can see the extras lack a Suffix. That’s fine, as one pitch in this particular expression does as well. For that, we will copy paste the voice files into said folder. Once copied over, open the oto.ini file within that folder, and copy+paste the lines for your extras within. Now, this pitch knows how to use these samples.

For the next pitch, you will have to add the suffix in by hand. Once you’ve added in the suffix, copy and paste those oto lines into the oto for the next pitch. Example:

Multipitch, Multiexpression Voicebanks in Open

Copy and paste the extras into the folder. For the next pitch, just hit Ctrl H to bring up Notepad’s search and replace. Just be careful what you put into it. Always double check your work!

Multipitch, Multiexpression Voicebanks in Open

Configure the rest of the extras and we can proceed!

Putting It Together With Voice Colors

Now that our files are ready, let’s move them into a brand new folder. Create a new folder, this one you can name whatever you please. For this example, I will call it “VOICE_Master”. VOICE_Master will need a few special files.

First, let’s gather all the readmes, character files and icons. Decide what icon you would like to use, and set up the character.txt accordingly. Update the name, author, image, web, etc. as you see fit. Next, it would be best to label each readme to refer to the proper voicebank, or combine them all into one. Once finished, you will want to place these within the VOICE_Master folder.

Next, it’s time to place each pitch into the main directory. PLEASE NOTE: You must place individual pitches into the main directory. Splitting the pitches up by expression (ex: VOICE_Master/Voice 1/1_G3) will not work, and OpenUTAU will split the expressions up. Rather, you want your setup to mimic the one below:

Multipitch, Multiexpression Voicebanks in Open

Let’s compress this bad boy and import it into OpenUTAU!

Multipitch, Multiexpression Voicebanks in Open
It works!

SUCCESS! The files are recognized as one voicebank. Exactly what we need for part two.

From here, you can follow our tutorial on OpenUTAU voice colors to achieve the desired effect.

Setting Up Voice Colors in OpenUTAU

About OpenUTAU’s Voice Colors

Voice Colors (also referred to as subbanks) are an exciting new direction for the OpenUTAU software, improving upon the usage and development of multi-expression voicebanks. Until now, users of UTAU have had a strict way to go about using Appends. For a monopitch voicebank with the additional expressions added in, creators of UTAU voices could configure appends with suffixes. Users could then plug the suffixes into the SuffixBroker within the software, or manually add the suffix to each note to achieve the desired effect. For example, a “Soft” append may include the suffix “S”, users would then add this letter onto the end of a note to make the software play that notes for that specific append.

The Old Way

To achieve a multi-pitch, multi-expression voice, creators would have to either split up each append (ex: soft, power, and the base voice all released and used separately) OR the creator of the voicebank would have to use the same pitches for each expression to be able to use all three voicebanks at the same time (ex: all pitches of soft, power and the base voice would all be recorded at A3, C4, C5). Such an example is our very own KASAI OG01 SALIENT voicebank. 

These issues add difficulty when developing new voicebanks, as many voice providers find it difficult to keep the same range for such different tones of voice. Luckily, we no longer have either of those problems with OpenUTAU Voice Colors. Essentially, every Color can have its own, unique prefix-map. In short, this gives users the ability to assign different ranges and suffixes to different voicebanks. 

An Example

Let’s say a voicebank includes three appends; Soft, Power, and Base. Let’s also assume each of these voicebanks has three pitches, but they all use a different set. Soft might use F3, A3, C4. The base may use A3, D4, and F4. Meanwhile, Power might include G3, E4, and A4. That’s very complicated and pretty much impossible to use together in UTAU. Some samples would be used on totally different ranges than they were meant to be used for, causing a rather chaotic sound. In this scenario, within UTAU, it’s better just to split these voices up to use individually.

HOWEVER, with OpenUTAU’s Voice Colors, we can now assign all three appends to their correct ranges. Soft can use F3, A3, and C4 where they are meant to be used, and the same goes with the other two.

OpenUTAU Voice Colors Tutorial
An Example of Defined Voice Colors

The New Way

In comes OpenUTAU’s Voice Color feature! A handy new tool that gives UTAU creators a greater scope of diversification for their expressions and range. The Voice Color feature is essentially the SuffixBroker’s natural evolution, becoming more and more like commercial vocal synthesis products. Users no longer have to plug Suffixes in individually or through a series of menus. Rather, simply make sure “CLR” is available to use at the bottom of a track, and make sure you are using a UTAU configured for Voice Colors. If not, we’ll teach you how to set that up in just a minute.

OpenUTAU Voice Colors Tutorial
Voice Colors in the CLR Editor

Okay, so what makes this so great? Just how easy is it to use? Well, that’s a simple question with a simple answer. By just the press of a button, or a click and drag, users can quickly and easily alter numerous suffixes at the same time. No more rooting around in readme files to copy and paste special characters!

OpenUTAU Voice Colors Tutorial
Example of Working Voice Colors

Awesome, how fun! Now we have greater flexibility than ever before to develop interesting and unique voicebanks. However, as OpenUTAU is still very fresh and new, it is going to have some issues as it continues to evolve. One such issue is setting up Voice Colors themselves. There’s not a lot of documentation or help just yet on that, so setting OpenUTAU’s Voice Colors up? A little tricky.

Setting Up Voice Colors in OpenUTAU

Let’s go through the process of setting up Voice Colors! The developers behind OpenUTAU have made this process pretty darn easy. Today, I am working on porting over APOLLO OG0X, so she will be the voicebank used in this example. Let’s go to Tools > Singers.

OpenUTAU Voice Colors Tutorial
Tools > Singers
OpenUTAU Voice Colors Tutorial
The Singer Window

Ah, here we are in the lovely Singers window. Here, we can see a list of all our subbanks, their aliases, Sets (folders), sample names, phonetics, and prefixes. Extend the window out to see even more information!

OpenUTAU Voice Colors Tutorial
The Singer Window, Expanded

Let’s set up some Voice Colors. Go ahead and click “Edit Subbanks”.

OpenUTAU Voice Colors Tutorial
The Edit Subbanks Window

Alright, here’s where the magic happens, and things get a little tricky. APOLLO OG0X’s VCV includes three voicebanks. Original, Breaking, and Murmur. Let’s set those up, so I can show you an issue you may stumble upon. Click “Add Color” and enter the name you wish. I’ll start with “Original”, her default singing voice.

OpenUTAU Voice Colors Tutorial
Naming a Color
OpenUTAU Voice Colors Tutorial

This one is a super easy monopitch voicebank, as it has no suffixes or prefixes. Simply hit save. 

OpenUTAU Voice Colors Tutorial
A Voice Color, Saved

Boom. Done. One color down. Now, let’s set up an append. Click “Add Color”, and name the append like before. Now, grab the suffix used in the oto.ini for this specific voicebank. Hit “Select All”, add the Suffix into the Suffix box, and hit “Set”.

OpenUTAU Voice Colors Tutorial
Select All, Enter Suffix, Click Set…

Looks good. Hit save and repeat for all appends.

OpenUTAU Voice Colors Tutorial
Defined Voice Colors

Voice Color Issues

All right, everything looks good, now let’s test it!

OpenUTAU Voice Colors Tutorial
An Error. The Suffix For “Breaking” Will Note Populate.

Ah… Uhm… Remember that tricky bit I mentioned beforehand? Yeah, this is it. As OpenUTAU is still in the early stages of development, it’s going to have some little bugs here and there. Notice how “Breaking”, APOLLO OG0X’s power bank, doesn’t assign her suffix to the note? At this time, on January 18th, 2022, OpenUTAU prioritizes Voice Colors alphanumerically. If the name of the default voicebank comes after the name of an append in the English alphabet, OpenUTAU assumes it is the default voice and won’t add a Suffix. This is just a simple override issue that may change! 

For now, let me show you a quick, easy fix. Go back through Singers > Select the UTAU > Edit Subbanks. For this instance, I’m selecting Original.

OpenUTAU Voice Colors Tutorial
Renaming A Voice Color

Simply hit “Rename”, and give it a name that, alphabetically, comes before the names of any append. For this example, I chose “Base”. I’ve also seen others simply use quotes (“”), which also works. Click “OK” and then “Save”. Go back to your track to check….

OpenUTAU Voice Colors Tutorial
Woohoo! Working Voice Colors!

There we go, all fixed! So long as the default voice has a name that comes first alphanumerically, it will stick to the bottom of the Voice Colors list and should function properly. As OpenUTAU develops, this trick may become unnecessary, but, for now, it is here to help, and so are we!

A Quick Tip

You set up your voice colors, you tested them and they worked, but when you loaded a UST… What the heck!? Why aren’t they working!?

Ugh, Not Again!

Here’s a nice quick fix. You may notice the UST imported in this example is in VCV format. Hit Ctrl + A to select all. Go to Lyrics > Japanese VCV to CV. This will turn the UST back to CV, and OpenUTAU will automatically convert the notes into VCV as seen below. We have only tested this with VCV voicebanks at the moment, so if you are employing a different method, you may need to experiment!

It’s Working Again!

LET’S HAVE FUN WITH VOICE COLORS!

Check back soon for more tutorials on OpenUTAU!

Need more assistance with UTAU and creating your very own voicebank? STUDIO OGIEN has compiled resources to use with the UTAU software. Check it out here! If you can’t find what you’re looking for, please let us know through our contact form or leave a comment on this article. We can’t wait to see what you create!

Audacity VS OREMO – Which is Best For Recording UTAU?

Recently, Kiko went over installing the UTAU software, but that leaves us with a question; how do we even record for the UTAU software? Not to worry! We’ve drawn up a small introduction to free audio recording programs for the UTAU software. These two different applications are commonly used with UTAU for recording voicebanks. We will be covering two names that you may be familiar with: the UTAU community’s good friends, Audacity and OREMO.

OKAY…SO WHAT IS AUDACITY?

Well, to put it simply, Audacity gives you the audacity to record. Okay, okay, I’m sorry, I couldn’t help myself. 

Ahem. Anywho. Audacity is a free, open-source, cross-platform audio software. It’s a relatively simple program, but it is a great starting point if you are overwhelmed with voicebank recording. With Audacity being so bare-bones, you can use it to learn the basics of recording any audio in general. You can cut, copy, splice, or mix sounds together as well as apply numerous sound effects like pitching a sample up/down. 

However, it isn’t the best for voicebanks due to the time and file sizes created when recording. When recording a voicebank, users in Audacity will either need to record one sample at a time, exporting and naming the file afterward, OR they must record in one long track, splicing and naming each recording separately afterward. That’s a lot of extra work! So, why do we still recommend it?

AUDACITY FOR POST-PROCESSING

Audacity is fantastic for post-processing. The software features multi-export, which is a very handy tool. After your recordings are complete, you can drag and drop several audio samples into the software if need be. Many users take this approach when removing background noise from their recordings. Afterward, one may use Audacity’s ability to multi-export each individual track separately, and Audacity will use the track’s name to name the exported samples automatically.

Batch-Processing

Alternatively (and much more fun) is Audacity’s impressive batch-processing capabilities. With batch-processing, a user can create a unique macro (once referred to as a “chain”) of events that Audacity will apply to any audio files within a designated folder. For instance, STUDIO OGIEN uses chains for KASAI OG01 and APOLLO OG0X’s development, as both use Audacity’s pitch effects to procure their unique voices. These chains include information on how high or low to change the pitch of each sample, as well as what file type to export as (.WAV). Their audio files are run through the chains and automatically exported for minimal work on the team’s part, rather than adjusting the pitch on each individual sample.

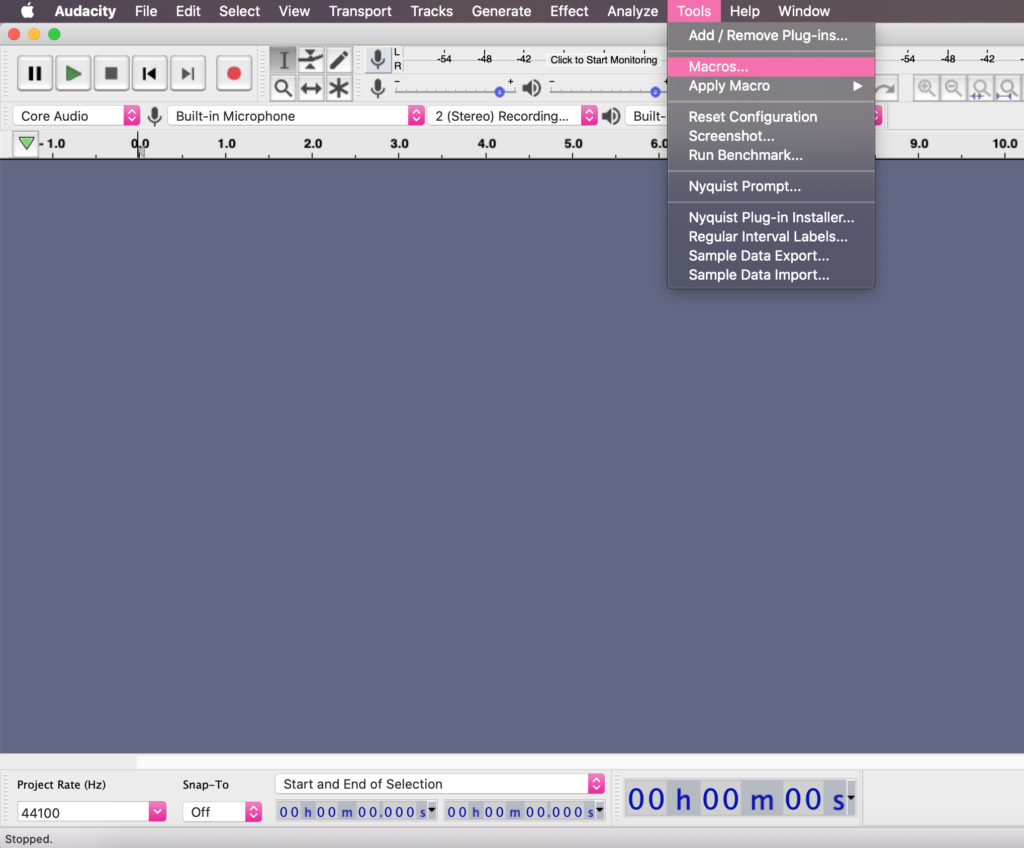
Audacity’s Macro option, under the Tools dropdown

To create a macro

  • Go to Tools
  • Select Macros…
  • Click “New”
  • Insert a name for the macro
  • Choose and inserts effects
  • For UTAU recordings, make sure to include “Export as WAV”
  • Save it!

A macro has been created! The user can now apply the macro to their preferred audio samples. Note, in the team’s experience, macros do not work well with the Noise Removal tool. 

To use the macro

  • Go to Tools
  • Select Macros…
  • Select the macro
  • Browse to the file folder and select the desired files
  • Select Open
  • The processed files will be placed in a new folder within the folder of the original files

[Download Audacity] – https://www.audacityteam.org/download/

OREMO AND UTAU: BEST FRIENDS


OREMO, developed by nwp8861, is the main audio recording software that STUDIO OGIEN uses in-house. Why? OREMO is explicitly designed to work with UTAU’s voicebank recording methods. The learning curve is upped a bit when you begin OREMO, but many in the community recommend starting with OREMO to help save time and sanity. 

One of the best things that OREMO has in its software is auto-saving, which automatically splits each sample into its own, named .WAV file. No more manually exporting or naming files! 

The OREMO Interface
The OREMO User Interface

OREMO’s UTAU Specific Features

OREMO also supplies an array of features that improves the overall recording experience. Users can take advantage of the application’s BGM (which plays beats at a specific note while the user records, helping them keep on-time and on-pitch). This is a life-saver when it comes time to configure the OTO. Several community-made BGMs are available for download as well to fit the tastes of the user. The program also gives access to a built-in metronome.

OREMO also supplies a pitch guide, which, once a recording has been completed, will compare the pitch of the sample to a predetermined note (this is the red line pictured above). This helps the user to determine if their sample is on-tune. Users may also insert their favorite reclists into the program as well as a list of unique Suffixes. Essentially, one can record a multi-pitch voicebank with ease this way, as the user can simply select a Suffix to attach to the voice sample, and OREMO will automatically add the suffix to the filename.

Audacity doesn’t necessarily include the features above, making it a more difficult software to record with. As OREMO is much more specialized, one can save an abundance of time by utilizing this unique tool.

WHY COVER BOTH PROGRAMS?

We understand that OREMO seems like the best option for recording a new voicebank. Still, sometimes, users prefer options they are familiar with rather than the community accepted software, which is OREMO. 

  • If you are looking just to practice audio recording and learning what all the terminology means, we say try out Audacity.
  • If you plan to record voicebanks (VC, CV, VCCV, or others), we recommend sticking with OREMO. 
  • For post-processing, we recommend Audacity or software similar to it.

Curious to know what the recording process is like for STUDIO OGIEN? Check out our OGIEN Recording Suite for more links and resources. 

How to Use CV UTAU Voicebanks

Introduction to CV UTAU

Those who are new to UTAU may find the idea of Voicebanks a little confusing. VOCALOID standardizes its voices, making utilization simple. VOCALOIDs recorded in specific languages essentially function the same, making the inter-usage of assets a breeze. Since UTAU is a community-based tool, many different styles and techniques have been invented over the years. In short, standardizing UTAU is pretty much impossible, making the learning curve a bit more intense.

The first Voicebank style invented for UTAU was “CV” (known as 単独音 tandokuon by Japanese users), or “Consonant-Vowel” style recordings back in 2008. Phonemes (smallest unit of speech distinguishing one word from another) in the Japanese language are rather simple, usually consisting of one consonant and one vowel. You may hear the phrase “Diphones” used when referring to CV Voicebanks. CV uses two phonemes for each sound in its library.

However, with its strong points come its downfalls. CV tends to be “choppy” and more robotic than more complex styles like CVVC, VCV, and VCCV. Still, it is where most users suggest starting out when recording and using the software, and many senior members of the community still utilize this recording method.

Romaji vs Hiragana

Before we begin, we need to establish a very important difference between Voicebanks! Depending on where the Voicebank was developed, it may be written in Romaji or Hiragana. Taught to children, Hiragana is the most basic style of the Japanese alphabet, and it is mostly written in diphones. It is a phonetic lettering system, meaning the symbols portray sounds rather than words. The word hiragana literally means “ordinary” or “simple”. Romaji is a phrase used to refer to the Romanization of Japanese words and sounds. 

So, how does that pertain to UTAU? Simply, a Japanese UTAU Voicebank can be written in either style and so can a UST. See where this is going? If the styles don’t match up, your UTAU won’t make any sound. How do we fix this without manually fixing every note? 

There are a few different ways, but let’s go with the easiest option. Plugins can handle a lot of these issues, and we have a few personal favorites on our OGIEN UTAU Suite page. Head on over to the page and download iroiro, a plugin that can actually convert the UST to Hiragana or Romaji. Follow the instructions for iroiro’s installation and you should be ready to go!

How to Use CV

CV Voicebanks are perhaps the easiest to use and record, and they are a great starting point for any beginner to UTAU. For the most part, you can import a UST file into UTAU, select a CV Voicebank, and hit play. However, for the sake of a better sound, many with experience in the software may tell you to “fit” the UST.

Fitting a UST file to a UTAU Voicebank will definitely improve the sound and make your covers sound more professional. By fitting the UST, you are telling the software to conform to that particular UTAU’s configurations and setup (OTO). This is an important step if the UST was not explicitly made for the UTAU you are using, and it helps to improve the smoothness and clarity of the voice. So, let’s do it!

How to Fit a UST to a CV Voicebank

  • Open a UST file
  • Select all (Ctrl+A)
  • Right-click on a note
  • On the pop-up, select “Property”. A new window will appear.
Properties Window
  • You may notice sections on this window labeled “Preutterance” and “Overlap”. To their right, there is a “Clear” button. We want to click that.
  • Next, at the bottom of the window, there is a box labeled STP. 
    1. If it has a value, delete it. 
    2. If the box is grayed out, double-click the box to clear it.
  • Press “OK”
Crossfade Buttons
  • In the top right of the main window of UTAU, you will see a group of four buttons (ACPT, P2P3, P1P4, RESET).
    1. Click RESET
    2. Click P2P3
  • That’s it! You’ve fit the UST to your CV Voicebank

One final tip for optimal smoothness: Crossfades.

The Crossfade function crosses the envelopes of a vowel sound and the preceding one as well. To use crossfading in your UST:

  • Select the notes
  • Go to Tools, then Built in Tools
  • Select Crossfade
  • Finally, press OK

Troubleshooting

Some users may experience odd glitches. If you play the track back and notice slurring happening, you may want to change what notes you select. In our experience, selecting only the notes tends to help. Sometimes, hitting Ctrl+A selects rests and other unique settings that cause the fit to mess up. Click the first note of the vocal track, and then scroll to the end. Select the last note by holding down Shift, then left-click the lyric. Fit the UST again, and it should work!

Download and Install UTAU

Hi everyone! 

Today, I will be going over the process of how to download and install the UTAU software onto your computer. This will be a learning experience for all of us! I have no idea what I’m doing, but Ceren is here to help me along the way, and I can help teach you all how to properly install the software without a hitch! (Well, there may be a hitch, but I won’t tell you about that…)

Changing Your System Locale

So, we need to do this thing in order to properly run the UTAU software. Before you try to skip this step, your UTAU software will read in gibberish when opened without doing this step. I know, we just wanna get to the fun stuff, but we have to do this for the ship to have smooth sailing. 

What does changing your system locale mean? All it means is that we are changing the locale for non-Unicode programs (I don’t know man, I’m just a writer. After some googling it appears that it’s just a term for readable character data.) from English to Japanese. 

If your PC doesn’t have Japanese already installed, head over to your Settings, select Language, then Add a Language. From this point, type Japanese into the pop-up box, select it, and hit the Next button. Next, deselect the “Set as my Windows display language” unless you wanna roll like that. You do you boo! But, if you want to keep your display language English, deselect that option. Last but not least, click that Install button!

Let’s actually change your system locale (for Windows)!

  1. Open the Control Panel
  2. Select the “Clock, Language, and Region” option
  3. Select “Region and Language”
  4. A window should pop up. Select the tab that is labeled “Administrative”
  5. Select “Change System Locale”
  6. A dropdown list will appear. Scroll until you find Japanese, then select it. 

BOOM SHAKA LAKA! UTAU should now be able to read UST’s correctly!

Have concerns? No worries, I did too. Changing the System Locale will affect how your backslash (\) is displayed, causing it to look like a yen symbol in some programs. I mean, it’s not like I use that in my writing or anything…..But,  I digress; let’s move on. 

Time to Download the UTAU Program

Now that our system can now register Japanese, let’s download the software! I don’t know about you guys, but I don’t understand much Japanese. Throw some French at me, then maybe. Anyways, we need to head over to this lovely website: http://utau2008.xrea.jp/, which will lead you directly to download the software.

When you get to the website, there will be some links followed by Japanese text. All you need to do is click the link that says v0.(latest version number) zipアーカイブ. This will launch a zip file, which you can unzip in your desired location on your computer.

This will open the fully operational version of the UTAU software. However, it will be entirely in Japanese. As I said earlier, I can no read that. How can this be fixed? There is an English patch available for us Western fans to utilize, which can be found here: http://utau.wikia.com/wiki/UTAU_wiki:UTAU_GUI_Translation.

We need to create a new folder within the UTAU(version number) folder you have with this patch. Create a new folder and name it “res.” Once this is done, unzip the English patch file into this new “res” folder. 

We Made It!

That’s…that’s it. We did it! We all now have a fully functional version of English UTAU to create new UTAUloids and make songs! 

As a note of caution: if you try to pull the UTAU icon out of the folder and launch it, it will run in the default Japanese language. To stop this from happening, you need to keep the icon with the English patch in the folder. If you want to launch via the program icon, you can drag the icon to the taskbar/dock of Windows or go into the UTAU folder and click the icon there. 

Thanks for joining this adventure with me! I’ll be back soon with more learning about the UTAU program. So we can navigate this exciting new world together. 

Until next time!

What is OpenUTAU?

About OpenUTAU

OpenUTAU is an open-source project created by StAkira, meant to improve upon the original editing environment for the UTAU software. The software provides a modern user experience, building upon the initial concepts originally introduced in UTAU. As an open-source program, it is available on GitHub. Contributors can assist in the development of this exciting new engine. Many other developers have contributed parts as well at this time, aiming to create a true community UTAU tool!

Editor
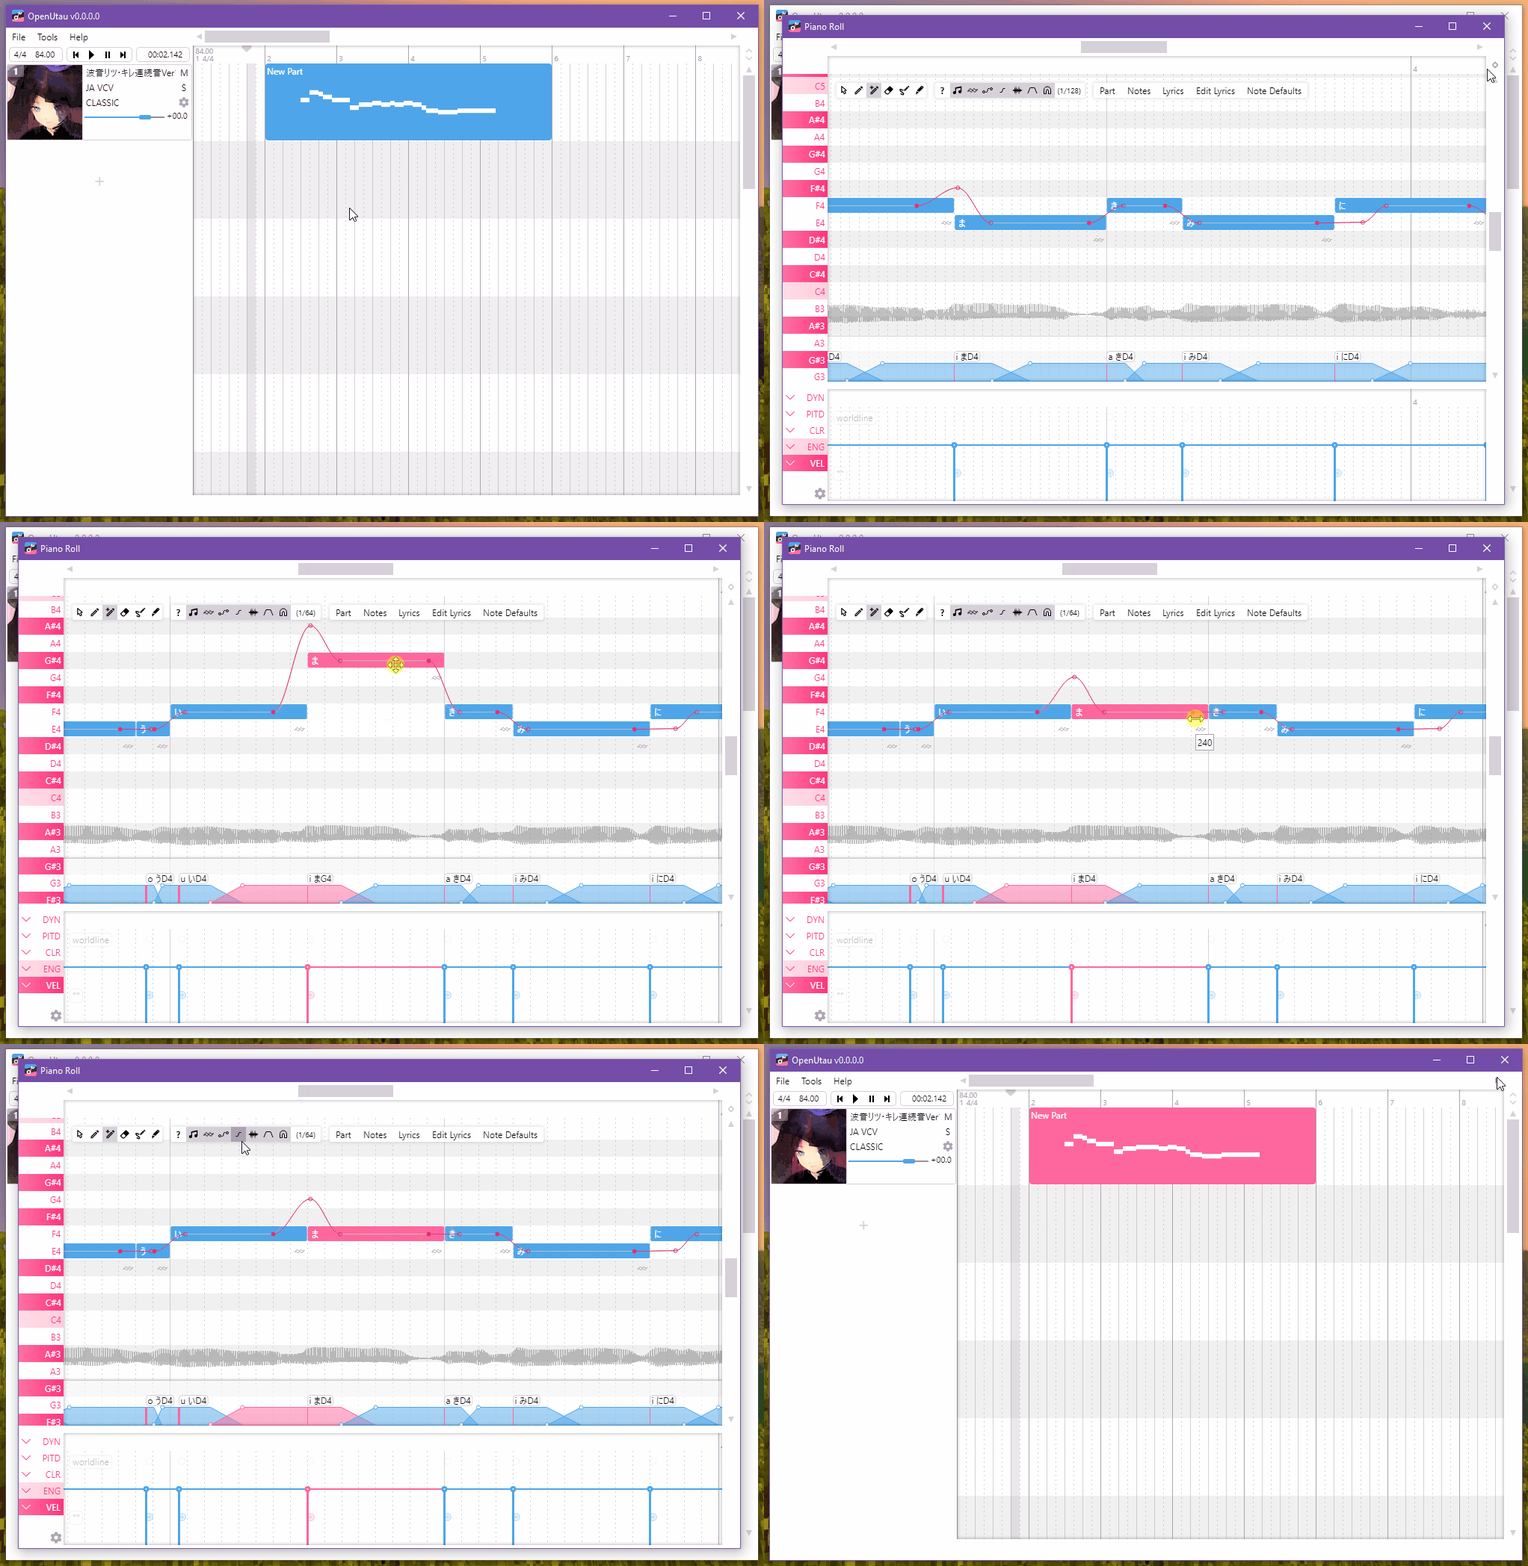
Preview of OpenUTAU from the project’s page

What OpenUTAU Is Striving To Be

Above all, the main focus of the OpenUTAU project is to create a modern UTAU user experience without replicating exact UTAU features. Certainly, it is planned to boast an easy-to-use plugin system, a smooth preview/rendering experience, an efficient sample connecting engine (wavetool), and an improved resampling engine interface.

OpenUTAU aims to grant a few of the UTAU community’s long-held wishes as well, bringing it up to speed with more advanced programs. It will feature select compatibility with UTAU technologies, including intelligent VCV and CVVC. The program will automatically convert CV to VCV. If a VCV sample isn’t available in the voicebank, it will fall default to CV. 

Additionally, perhaps the most exciting feature, Internationalization, will include UI translation and file system encoding support! What does this mean? In short, you should prepare for an easier user experience. Complex languages in UTAU, such as Arpasing English, will be easier to use than ever. Forget [l ih v], just enter “live”! The software does the rest. At this time, select languages and voicebank styles are compatible with this technology.

Currently, OpenUTAU presents a rather transparent operation that aims to keep the user in the loop. In addition to a Discord server for users and developers, the engine notifies the user with update notifications. These updates install directly from within OpenUTAU. All in all, the software appears to be on its way to a more powerful, community-based tool that UTAU fans have been wishing for. We are excited to see where it goes!

OpenUTAU automatically checks for updates on launch!

What It Is NOT

At this time, it appears the scope of OpenUTAU does not include its own resampling engines (a.k.a resampler), a full-featured digital music workstation (ex: mixing and mastering), nor does OpenUtau intend to be a Vocaloid duplicate (save a few similar features).

You Could Help Shape The Future Of OpenUTAU!

As open-source software, OpenUTAU was literally made to be a community endeavor! Developers across the globe are able to contribute and improve upon the project. Currently, users can report issues through Discord or Github directly to the creators. For those with skills in coding, contribute fixes through pull requests! The team has also set up a Trello board to see the engine’s progress.

Development Resources:
Discord | GitHub | Trello

What Is UTAU? A Brief Overview

UTAU is a Japanese singing synthesizer application created by Ameya/Ayame. This program is similar to Vocaloid, a professional vocal synthesis software that would inspire UTAU’s creation. Furthermore, UTAU is an independent application that is free for anyone to download and use (there is also a shareware version with special features available, but the free version on its own is already perfectly solid). The program uses .wav files the user provides to create a singing voice, which will synthesize by introducing song lyrics and melody.

UTAU, like Vocaloid, presents the user with a piano roll. Additionally, users can input notes/midis/etc. into the software, add lyrics, and tune the vocal to create a semi-realistic singer, more commonly referred to as a voicebank. Moreover, each Voicebank is unique, with its own strengths, weaknesses, voice type, range, and terms of use.​

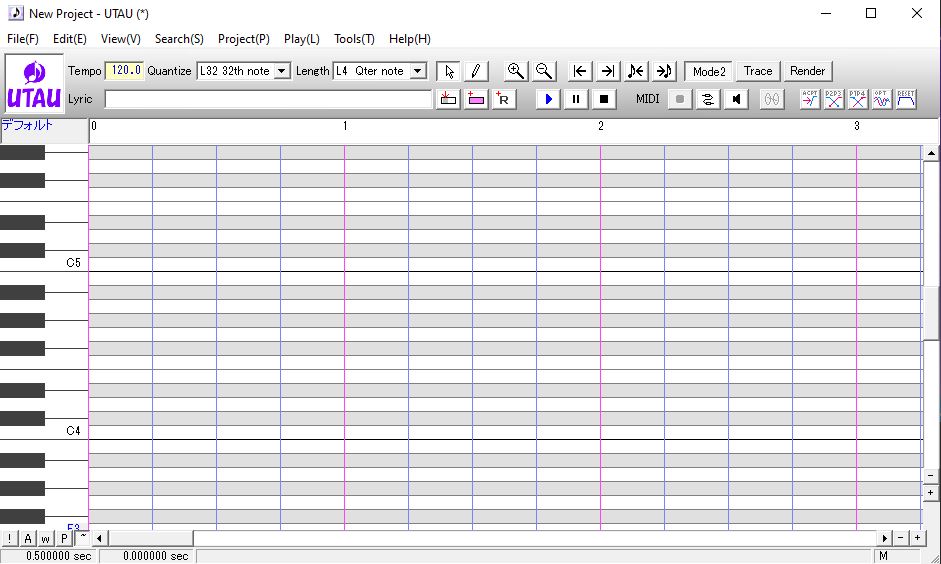
A look at the UTAU GUI​ ​ 

UTAUloids Rise To Fame

UTAUloids have been on the rise since the shareware’s release in 2008. Certainly, the most notable faces of the program are Defoko and Kasane Teto. Defoko being the built-in voice for the UTAU shareware, while Teto is the ‘face’ of UTAU. They both have immense popularity. A small fun fact: new Vocaloid fans often mistake Teto as an official Vocaloid voicebank! Check out their voicebanks in action below.

How Does It Work?

First off, we’re glad that you’re excited to jump into creating your first Voicebank, but there are a few things you need to know first!

Programs to Create Voicebanks

Fl Studio: A DAW (Digital Audio Workstation) used within the UTAU and Vocaloid communities for many years. It’s most used by these communities to mix songs/covers.

Audacity: A free-to-use DAW. It is typically used to record and splice voicebank samples.

Reaper: A popular DAW that offers a free trial period. Often used to mix songs and is rather user-friendly.

OREMO: A free-to-use program created specifically for recording Voicebanks. This program is a fan favorite for recording since it will automatically name a user’s voice samples as well as add aliases to the file name. Features a metronome and BGM function to keep recordings on time and on the tune.

setParam: Another program created specifically for use with UTAU, specifically OTO configuration. While UTAU possesses an interface for configuring OTOs, setParam offers a more intuitive interface and allows the user a much more detailed look at their recordings.

MIDI: (Musical Instrument Digital Interface) Often used in music production, it is a standard file format for communicating information between musical instruments. MIDIs can be used in the creation of UST files.

Resampler: A vital component of UTAU. This engine reads a Voicebank’s WAV files when the user plays a track in UTAU or when they render it for external use.

FRQ: Files generated by the resampler to properly read the Voicebank’s WAV samples. If you download a Voicebank that has FRQ files in it, don’t delete them! The creator may have edited them manually to fix errors and glitches in the Voicebank.

Voicebank Types:

CV: “Consonant Vowel” recording format. The smallest and simplest style of Voicebank, this is a great choice for beginners to get acquainted with the recording process.

VCV: “Vowel Consonant Vowel”, blends together the ending vowel of a sample with the consonant-vowel pair of the next. While it is more labor intensive to create compared to a CV bank, it’s the most popular form of Voicebank for its smooth end result.

Lite VCV: A simplified/compact version of a VCV Voicebank with more smoothness than CV. A good option for those wanting to branch into VCV.

CVVC: A CV Voicebank with “VC” samples to improve clarity and smoothness. Easier to record than VCV, but trickier to properly configure. This recording style can offer more flexibility than VCV, depending on the Voicebank.

Voicebank Styles:

VCCV: Developed by Cz, one may refer to this as the new standard for English UTAU Voicebanks. Widely supported by the community and praised for its clarity, though it does create an Americanized accent in a lot of Voicebanks.

Rentan: A recording style specific to CV Voicebanks. Samples are recorded all at once, rather than one at a time, within the same file. After being configured in UTAU, it works just the same as a standard CV voicebank.

Multipitch: A style of Voicebank that uses multiple single voicebanks, all recorded at different pitches, into one larger Voicebank. Allows for a much greater vocal range with a more natural sound.

Kire/Powerscale: A Voicebank type where, as the voice reaches higher pitches, the recordings become more powerful. Popular in the community and useful for Rock songs.

Appends: A term originally derived from Vocaloid (specifically, Crypton Future Media Vocaloids). These Voicebanks are recorded to fit a specific theme or timbre. Examples might be “Soft”, “Whisper”, “Power”, “Dark”, etc. Commonly recorded as stand-alone Voicebanks, but may also be included in Multipitch/Multi Expression voices.

Terms To Know For Post Production

Mora: The number of syllables in a voice sample. For example, “a-a-i-a-u-e-a” is a 7-mora style recording.

Prefix map: An important file for Multipitch Voicebanks, this is how UTAU knows what voice samples to play on which notes.

Tuning: In which the user warps, bends, and/or changes the pitch of a voice track in a Vocal Synthesis software. This is done to change the way the voice sings a song in order to make it more unique or more human-like.

Consonant Velocity: A configuration in UTAU that can be changed per track or single note. This affects how quickly the consonant part of the voice sample plays. Usually, this is used to avoid a “slurring” sound in playback for quicker songs.

Flags: Codes used by the Resampler to alter the voice properties of the UTAU. They can be used to add breathiness to a voice, reduce nasal tones, make the voice sound more masculine/feminine, and much, much more. The Flags are typically defined per Resampler, so some may offer different effects than others.

Alias: A name given to voice samples in the OTO. This tool can be used to assign multiple names to the same recording, which is commonly used in VCV banks.

Mixing: The process of taking vocal tracks and combining them with an instrumental in a pleasing way.

File Types

.WAV: The file format UTAU voice samples are recorded in. WAV is the only file type UTAU will use for a Voicebank on Windows computers.

.UST: UTAU Sequence Text Files. Similar to sheet music or a MIDI file (which can be turned into a UST), this is the main file type used in UTAU to store information about a voice track.

OTO: Also known as an oto.ini, this is the file used to tell UTAU how to distinguish between the starting point of a sample, where the consonant begins, where the vowel is, the cut off of the sample, and how much of the sample is okay to stretch on longer notes.

Additional Terms to Know When Working With UTAU Software

UTAU: The name of the software, it is also the Japanese word for “Sing”.

Vocaloid: Perhaps the most well-known Vocal Synthesis program, developed originally for use by professionals. It is a commercial program that requires the user to purchase the base software as well as each additional voice they may want to use.

UTAUloid: An older community term used to refer to a specific UTAU character. Additionally, this term originates from “Vocaloid” and is in use alongside it.

Pitch: How high or low a tone is.

Timbre: The character or quality of a voice, different from pitch or intensity. Youthful, gruff, feminine, etc. could all be descriptors of timbre.

Vocal synthesis: The artificial production of human singing voices/voice-like instruments, much like speech synthesis. Common term when referring to UTAU, Vocaloid, and other similar applications. 

Voicebank:  A collection of voice samples and OTO(s) compiled for use within UTAU as a functioning singing voice. A Voicebank is usually alongside a character or mascot that represents the voice. Often referred to shortly as a “Bank”. 

Vipperloid(s): A popular series of Japanese UTAU. You may recognize members such as Yokune Ruko and Sukone Tei. They originated from vip@2ch.

Nico Nico Douga/ニコニコ動画: Similar to a Japanese version of YouTube, this video-sharing website is incredibly popular with the Japanese Vocal Synth community. 

Nikokara/ニコカラ: A Nico Nico Douga supported service that displays Hiragana song lyrics across a video.

Let’s Put Those Terms To Use!

Check back soon for a more in-depth look at the UTAU software!

Need more assistance with UTAU and creating your very own voicebank? STUDIO OGIEN has compiled resources to use with the UTAU software. Check it out here! If you can’t find what you’re looking for, please let us know through our contact form or leave a comment on this article. We can’t wait to see what you create!

Terminology and information referenced from utau.us, PRISMOID, and Wikipedia.

Voicebank Progress


Honos VALOR
12%
Apollo PRIME
0%
Theia MONARCH
0%
-->